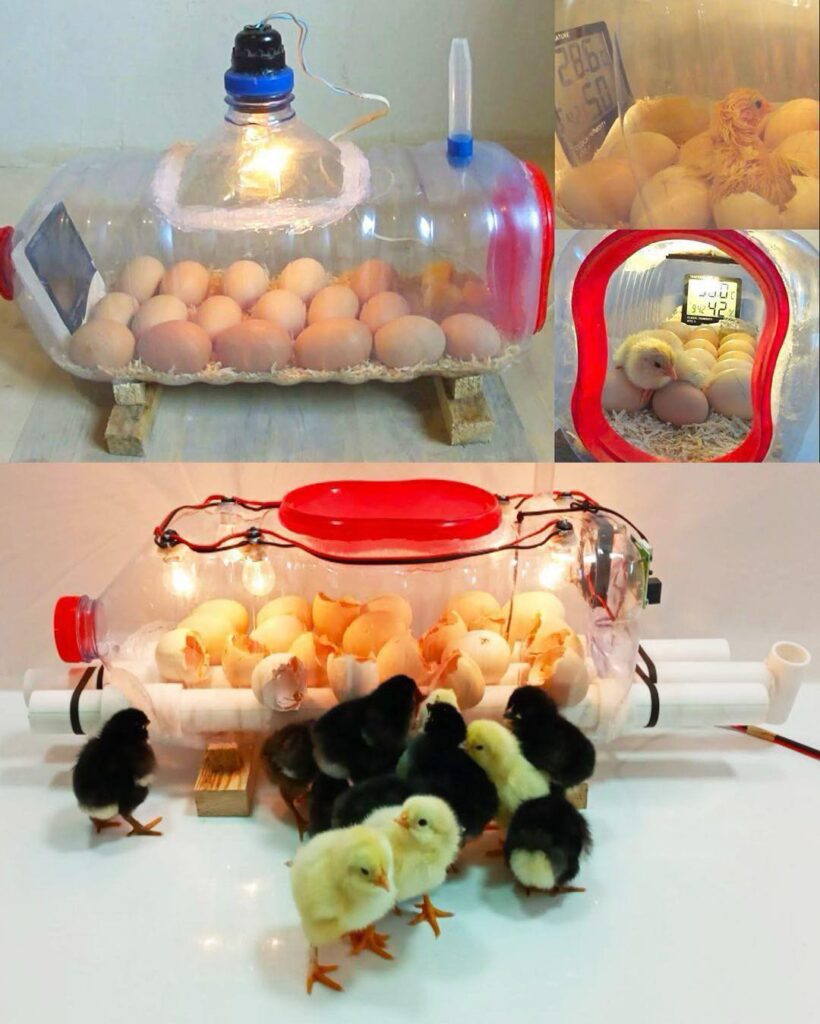
Step 4: Add the Eggs
- Lay the fertilized eggs gently inside the bottle, ensuring they’re not directly under the bulb.
- Leave a small gap between eggs to allow air circulation.
- Mark each egg with an X on one side and an O on the other for easy tracking during turning.
Step 5: Monitor Temperature and Humidity
- Place a thermometer inside the bottle close to the eggs, aiming for a constant temperature of 37.5°C (99.5°F).
- Monitor daily to ensure the heat stays within the ideal range.
- Use a hygrometer to check humidity, if available.
Step 6: Regulate and Turn Eggs
- Turn the eggs at least 3 times a day to prevent the embryo from sticking to the shell.
- Stop turning the eggs after day 18, preparing them for hatching.
- Adjust the temperature and increase humidity slightly in the final 3 days.
Step 7: Add Ventilation and Observation Features
- If possible, install a small USB fan for gentle airflow to mimic natural conditions.
- Cover the open cut window with clear plastic wrap to observe without losing heat.
- Poke tiny ventilation holes at the top of the bottle for airflow.
🐥 Hatching Time!
By day 21, your chicks should start pecking through their shells if all conditions were maintained. Do not assist unless absolutely necessary, and ensure the environment remains warm and humid as they hatch.
✅ Tips for Success:
- Test your incubator for a full day before placing eggs to ensure stable temperature and humidity.
- Place the incubator in a warm, draft-free room to help maintain a consistent internal environment.
- Label the eggs with date laid or set to track progress.
- Be patient and observant. Natural hatching varies and requires care.
🔚 Conclusion
Building a homemade egg incubator using a water bottle is an affordable and educational project, especially for beginners or small-scale poultry enthusiasts. While it doesn’t replace professional incubators in terms of precision and control, it works surprisingly well with proper monitoring and care. With this DIY setup, you can witness the incredible journey from egg to chick right in your own home.


