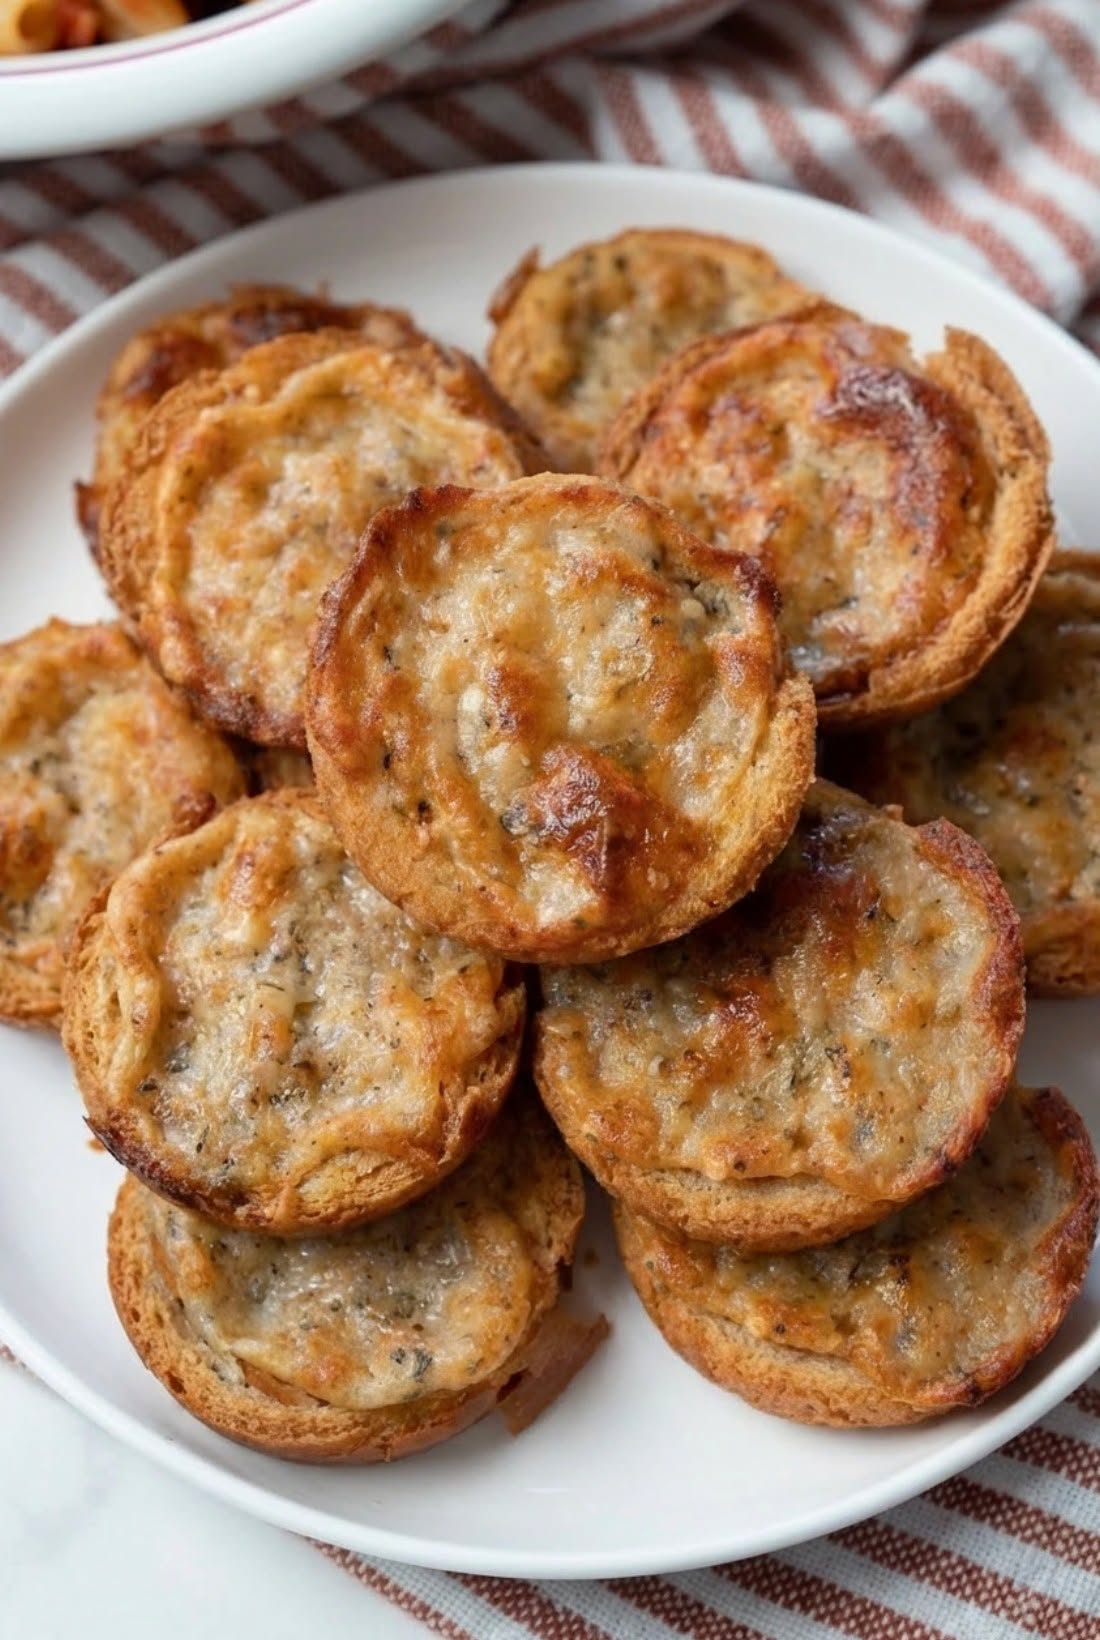
How to Make Them (The “Roll” Method)
-
The Collection: If your crusts aren’t already in strips, cut the edges off your bread slices as cleanly as possible. You want long, flexible strips.
-
The Soften: If the bread is a bit dry, microwave the strips for 10 seconds under a damp paper towel. This makes them pliable so they won’t snap when you roll them.
-
The Flavor Bath: In a small bowl, whisk together the melted butter, garlic, herbs, and Parmesan.
-
The Assembly: Take a strip of crust and lightly brush it with the garlic butter. Roll it tightly into a spiral (like a tiny cinnamon roll). If the strips are short, you can wrap a second strip around the first to make a larger roll.
-
The “Mold”: To keep them circular as they bake, place each roll into a mini-muffin tin. This forces them to maintain that beautiful round shape shown in the photo. Brush the tops with any remaining butter.
-
The Bake: Slide them into an oven preheated to 190°C (375°F). Bake for 8–12 minutes. You want the cheese to bubble and the bread to turn a deep, toasted gold.
Serving Suggestions
These are far more versatile than your average dinner roll. Because they are bite-sized, they make incredible:
-
Soup Croutons: Drop one into a bowl of tomato basil soup for a gourmet touch.
-
Pasta Sidekick: Serve a plate of these alongside a heavy lasagna to add a much-needed crunch.
-
The “Snack Plate”: Pair them with a marinara dipping sauce for an easy Friday night movie snack.
Chef’s Hint: If you want an extra-gooey center, tuck a tiny cube of mozzarella into the center of the roll before you start winding the bread around it. When you bite in, you’ll get a mini “stuffed crust” surprise.
Are you looking to use these as a side for a specific meal, or are you just trying to clear out the bread bin?


