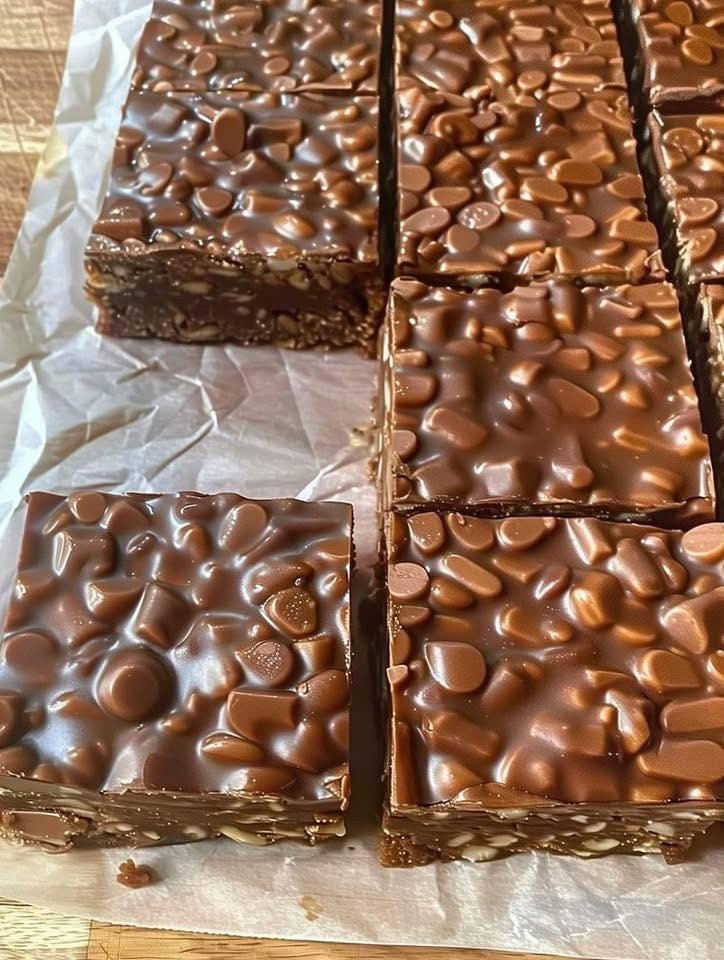
How to Make Homemade Crunch Bars
-
Prepare Your Pan:
Line an 8×8-inch or 9×9-inch baking pan with parchment paper, leaving some overhang to make removal easier later. -
Melt the Chocolate:
In a large microwave-safe bowl, combine the milk chocolate chips, semi-sweet chips, and peanut butter (if using). Microwave in 30-second intervals, stirring each time, until smooth and glossy. -
Add the Crunch:
Gently stir in the crispy rice cereal until all the pieces are well coated with the melted chocolate mixture. Be careful not to crush the cereal — you want to keep that light, airy crunch. -
Spread and Smooth:
Pour the mixture into the prepared pan and spread it evenly using a spatula. Tap the pan gently on the counter to remove air bubbles and level the surface. -
Chill to Set:
Refrigerate for about 1 to 2 hours, or until the bars are firm enough to cut cleanly. -
Cut and Serve:
Lift the slab out of the pan using the parchment paper and cut into squares or bars. Store them in an airtight container in the refrigerator for up to 2 weeks (if they last that long!).
Optional Variations
-
Add-ins: Stir in mini marshmallows, chopped nuts, or toffee bits for added flavor and texture.
-
Dark chocolate lovers: Use all dark chocolate for a less sweet, more sophisticated version.
-
Layered look: Add a drizzle of melted white chocolate on top for a fancy finish.
Why You’ll Love This Recipe
These homemade crunch bars check all the boxes — they’re quick, customizable, and crowd-pleasing. They’re perfect for lunchbox treats, holiday platters, or whenever you need a no-fuss dessert that everyone will rave about.
The best part? No oven, no fancy tools, and no stress. Just a few ingredients, a little stirring, and a whole lot of chocolatey crunch.


