🧁 Instructions:
1. Make the Crust
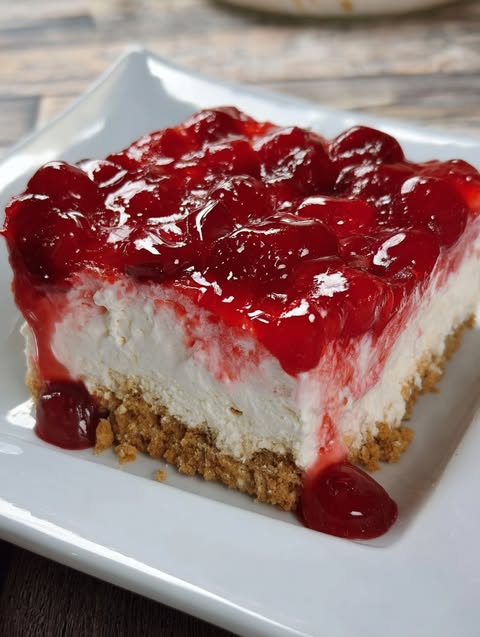
In a medium bowl, mix the graham cracker crumbs, melted butter, and sugar until the mixture resembles wet sand. Press it firmly into the bottom of a 9×13-inch baking dish to form an even crust. Chill in the fridge while you make the filling.
2. Prepare the Filling
Using a hand mixer or stand mixer, beat the softened cream cheese until smooth and fluffy. Add the powdered sugar and vanilla extract, then continue to mix until fully incorporated. Fold in the whipped topping gently until no streaks remain.
3. Assemble the Cheesecake Bars
Spread the cream cheese mixture evenly over the chilled crust. Smooth the top with a spatula.
4. Add the Cherry Topping
Carefully spoon the cherry pie filling over the cream layer, spreading it out evenly.
5. Chill and Serve
Refrigerate the bars for at least 4 hours (or overnight) to allow them to set. Once chilled, cut into squares and serve cold.
💡 Tips for Best Results:
-
Crust Tip: Use the bottom of a glass or measuring cup to press the crust down evenly and firmly.
-
Flavor Boost: Add a pinch of cinnamon to the crust mixture for extra depth.
-
Storage: Keep refrigerated in an airtight container for up to 5 days.
Why You’ll Love These Bars:
-
No-bake convenience — no oven required!
-
Perfectly creamy with a fluffy, mousse-like texture.
-
Sweet and tangy cherry topping adds a bright burst of flavor.
-
Great for holidays, birthdays, or whenever you’re craving cheesecake.
Final Thoughts:
These No-Bake Cherry Cheesecake Bars are everything you want in a dessert: creamy, crunchy, fruity, and downright irresistible. The layered beauty of graham cracker crust, smooth cheesecake filling, and glossy cherry topping is as stunning to look at as it is satisfying to eat.
Make a batch today and see why this easy dessert becomes a fast favorite in every kitchen!


